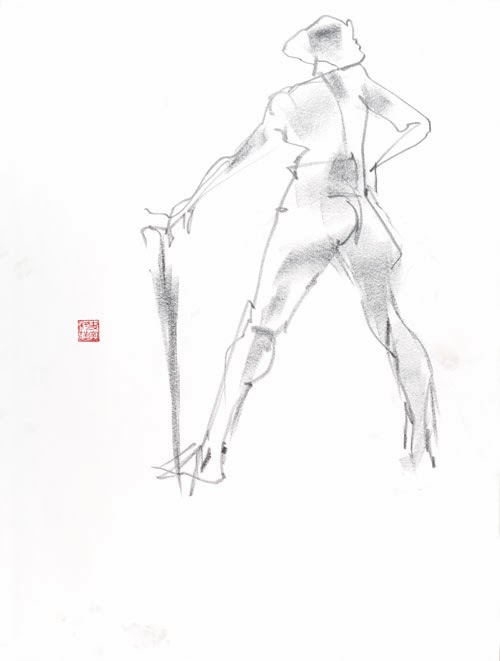
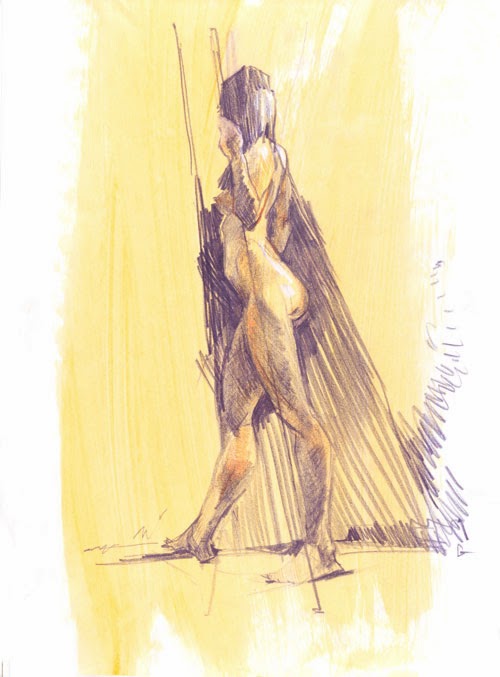
A list of the top 10 mistakes beginners make when life drawing, with suggestions on how to improve.
 |
| Graham Smith |
1. Sitting in the wrong spot. If you are not directly facing the model, (like exactly), and are sitting too close, or far - you are setting up to fail before the drawing begins. Proper orientation to the model is the easiest thing you can do to improve your life drawing.
Rotate your work to directly face the model. Exactly straight on, not off to one side, not even a little. If you sit on a bench the model should be seen directly over your work. If you are standing at an easel, the model should appear directly to the side.
The proper distance from the artist to the model is achieved when the model appears to be the same size, or slightly smaller, than the drawing surface. Back up, or move closer to make that happen.
The artist is at the correct distance from their artwork when at arms length. (Not hunched over.) Hold your arm out fully, so you dan draw with your arm, and see the work entirely. Make small adjustments for each new pose, don't move the work or you head position during the pose.
2. Drawing too small: (AKA tiny drawings) a figure drawing the size of your hand is the primary symptom of the life drawing beginner.
Drawing tiny figures hide mistakes, (and isn't fooling the instructor). Drawing figures at a larger size reveals the issues hidden in a small drawing, like proportion relationships, angles, planes, and value differences. You have to see things to draw them, and there has to be room to actually draw the stuff you see.
Drawing larger helps the artist see the gesture line flowing though the longest axis - estimating angles, and proportions are easier in a larger drawing, too.
The goal: Filling the page with the figure demonstrates size control, planning, and improves composition. An artist that confidently fits the figure in the page demonstrates basic mastery, and is ready to tackle more complicated issues.
3. No page design: (AKA bullseye placement, mom's photo) is a drawing started in the exact center of the page, typically beginning with the head, and drawing downwards, often resulting in the figure running of the bottom of page, and lack of composition. Typically related to "tiny drawing"syndrome.
Placement of the figure on the page is the first major artistic decision. Most beginners don't make an intentional choice where to place the figure. Beginners impulsively start drawing in the middle of the page, where "there is plenty of room." Completely ignoring that thing called composition.
Before drawing anything, ask yourself, is this pose tall, or wide? How will it fit on the page? What type placement matches the mood you want to create? Only then, draw a gesture line through the space you've chosen.
4. Police chalk outline: (aka cookie cutter), the beginners practice of outlining the contour of a figure, without any drawing on the inside of the shape. Beginners get stuck at the outline stage, and don't know what to do next, not realizing they must draw through the figure to build dimension.
 Draw, draw, draw! Anywhere is ok, but inside the figure is a great place to start. Draw lines inside the cookie cutter that divide it into basic proportions of head, neck, torso legs, knees, ankles, feet, measuring carefully. Draw additional lines to show the edges between planes, or that follow the angle of the plane themselves. Draw lines that separates the light side from the shadow side.
5. Sausage links: when a beginner draws one body part, then the next, linking each body part to the next, one at time, like sausage links.
This is an ineffective drawing strategy because the drawing ends up looking stiff, without any overall gestural flow or movement. It is also ineffective because the artist cannot place the figure intentionally on the page using this strategy. The drawing simply "ends up" wherever it leads .... which is usually at the bottom of the page, without room for the feet. (See mistake #3)
The solution is to mark the the top and bottom boundaries where the figure is to be drawn. After observing the figure, drawn a line from the top mark, through the longest axis of the figure, ending at the bottom mark. That’s the famous gesture line you’ve heard so much about. Divide that line into proportions of legs, torso head, thus ensuring the figure will fit in the space selected.
6. Drawing symbols: (AKA drawing what you think, instead of what you see.)
The beginner often draws a predetermined ideal, "a symbol" they've learned to represent a body part, instead of observing nature, noting shape, angle, value, and proportions, then recreating those observed metrics.
Beginners believe a symbol for each body part exists, and once they are all memorized, the student "knows how to draw". Not true. Beginners also confuse symbols, with anatomy, saying to themselves, "I gotta learn more anatomy" - thinking memorizing muscle and bone names, will provide the ability to draw realistically. Observation is the key. Without proper observation, you may know names of the muscles, yet struggle with drawing them. Seeing the model reveals all the answers. And learning "to see" is the point of life drawing.
Learn to measure proportions using a stick, estimate angles using the clock, determine values, simplify geometries. These skills can be learned by anyone. That is why they are important.
Learning to "see" is the goal of life drawing, learning to more completely understand what you are looking at...life drawing practice trains your mind to see underlying geometry, how to measure angles accurately, determine which areas are lighter, or darker than the areas next to it, which things are bigger, or more important. These observation skills enable the beginner to progress from symbolic, to observational drawing.
 7. Missing parts: (aka amputee emergency) when a beginner "forgets" or "didn't have time" to draw the hard parts, like the hands and feet. The beginner drawing fades off toward the ends of the arms and legs, two lonely lines representing arms... ending in blank paper. Other coping mechanisms to avoid drawing hands and feet include, drawing a figure standing in tall grass, or holding their hands behind their back.
Squint to see the basic shape of the missing part, and estimate it’s size based on another body part, already drawn. (See mistake # 5 and #8)
8. Tennis racket head: (aka frying pan face) is what instructors call the blank oval a beginner draws instead of the head and face.
Treat the head, or any missing body part, like everything else, and block in the shapes, and values from the largest things to the smallest. Estimate the size of the missing part based on another body part that already been drawn.
One simple way to estimate the heads size, once the body is sketched, is to measure the distance from the bottom of the pectorals, up to the bottom of where the chin should be. That distance will be similar to the head size. Add that distance upwards from the chin to estimate where the top of the head is supposed to be. Draw an oval/egg shape between those 2 measurements.
When an instructor sees tennis racket face, we know the artist is fearful, and struggling to reconcile symbolic drawing with what they see. Use basic measurement tools such as measuring stick, or measuring angles using hands of a clock metaphor.
9. Detail crazy: (aka Only Fools Rush In) The mistaken strategy of drawing details, before roughing in large masses. Often related to “sausage links” drawing style. This misconception equates more detail with greater realism, when in fact, more detail makes a drawing appear busy, and unfocused.
Squint your eyes to see only the major value blocks, and to eliminate details. Finesse the proportions of the major elements first. Proportion, and value are the first steps toward adding realism. Details are saved for last, and are the sparkling jewels of your composition.
10. The feathered edge: (aka furry line) when a beginner "shades in" one side of a shape with a small, wispy, feathered edge, on one side of a figure. This is a beginners first step in attempting "shading".
 To improve, fill each area with one of 4 basic values, white, light grey, dark grey, or black. The goal is to block in values over the entire page, to indicate the lighting direction, define the geometry, and to set the mood. Each shape will contain 1 of the 4 values. Each shape will be lighter, darker, or the same value as the shape next to it - including the background. Keep adjusting the values and shapes until they are organized logically, and give the effect desired.
Bonus Tips
11. Floating figures: (AKA spaceman) a figure drawn without appearing to touch the ground, it is just floating in space, sometime without feet. A figure drawn without any indication of the ground plane is a figure without weight, and demonstrates the beginners difficulty with perspective, gesture, direction of force, and drawing feet.
12. Normalization: beginners rationalize the models appearance by drawing things as expected to be, rather than what is actually observed. Beginners combine a quick glance at the model with the memorized symbols expected, and create a half imagined version of the pose.
For instance, angles are often "straightened out"' and deep curves are "flattened" all in order to "normalize" them, or bring them within the realm of expectation. These drawing don't reconcile with observation, and the students get frustrated. Use a plumb line to keep things lined up, and measure carefully to avoid normalizing. You have to understand what you see. All the answers are in front of you.
13: Emotional turmoil: (aka the feels) the main issue artists struggle with in life drawing workshops is their own emotions. Performance anxiety, awkwardness about nudity, being good enough, ego safeguarding, all take away concentration, willingness to experiment, and therefore progress.
Setting yourself up to succeed by creating a safe place to experiment, will help artists want to try new approaches to learning to see, and draw.
Read more, or go draw something!
Muscular Male Short Pose
Gesture Drawing Part 1